Setup
Setting up WARP in your Kotlin Multiplatform project is straightforward. You only need to add the dependencies to your Version Catalog (libs.versions.toml), configure your shared build.gradle.kts, and set up your iOS Xcode Widget target.
1. Version Catalog
Add the WARP dependency, KotlinX Serialization, and Compose Runtime to your gradle/libs.versions.toml:

[versions]
warp = "0.1.4"
kotlinx-serialization-json = "1.11.0"
compose-multiplatform = "1.11.1"

[libraries]
warp-widget = { group = "io.github.devatrii", name = "warp-widget", version.ref = "warp" }
kotlinx-serialization-json = { module = "org.jetbrains.kotlinx:kotlinx-serialization-json", version.ref = "kotlinx-serialization-json" }
compose-runtime = { module = "org.jetbrains.compose.runtime:runtime", version.ref = "compose-multiplatform" }

[plugins]
kotlin-serialization = { id = "org.jetbrains.kotlin.plugin.serialization", version.ref = "kotlin" }
composeCompiler = { id = "org.jetbrains.kotlin.plugin.compose", version.ref = "kotlin" }
2. Shared Module Gradle Configuration
In your shared module's build.gradle.kts (e.g., shared/build.gradle.kts), apply the serialization plugin, export warp-widget in iOS framework binaries, and declare dependencies in commonMain:
plugins {
    // ...
    alias(libs.plugins.kotlin.serialization)
    alias(libs.plugins.composeCompiler)
}

kotlin {
    listOf(
        iosArm64(),
        iosSimulatorArm64()
    ).forEach { iosTarget ->
        iosTarget.binaries.framework {
            // ...
            export(libs.warp.widget)
        }
    }

    androidTarget {
        // ...
    }

    sourceSets {
        // ...
        commonMain.dependencies {
            // Multiplatform dependencies
            api(libs.warp.widget)
            implementation(libs.kotlinx.serialization.json)
            implementation(libs.compose.runtime)
        }
    }
}
App Size & KMP Business-Logic Compatibility
Notice that we are only including compose.runtime here. It does not pull in Compose Multiplatform UI (compose.ui, graphics, or rendering pipelines), meaning it will not increase your app size.
This allows WARP to seamlessly work even in pure Kotlin Multiplatform (KMP) projects that only share business logic without full Compose Multiplatform UI.
📊 For an app size benchmark and detailed impact breakdown, check the Todo Widget Benchmark Example.
3. iOS Target Setup
To render your widgets on iOS using Swift & WidgetKit, follow these Xcode setup steps:
Step 3.1 – Create Widget Extension Target
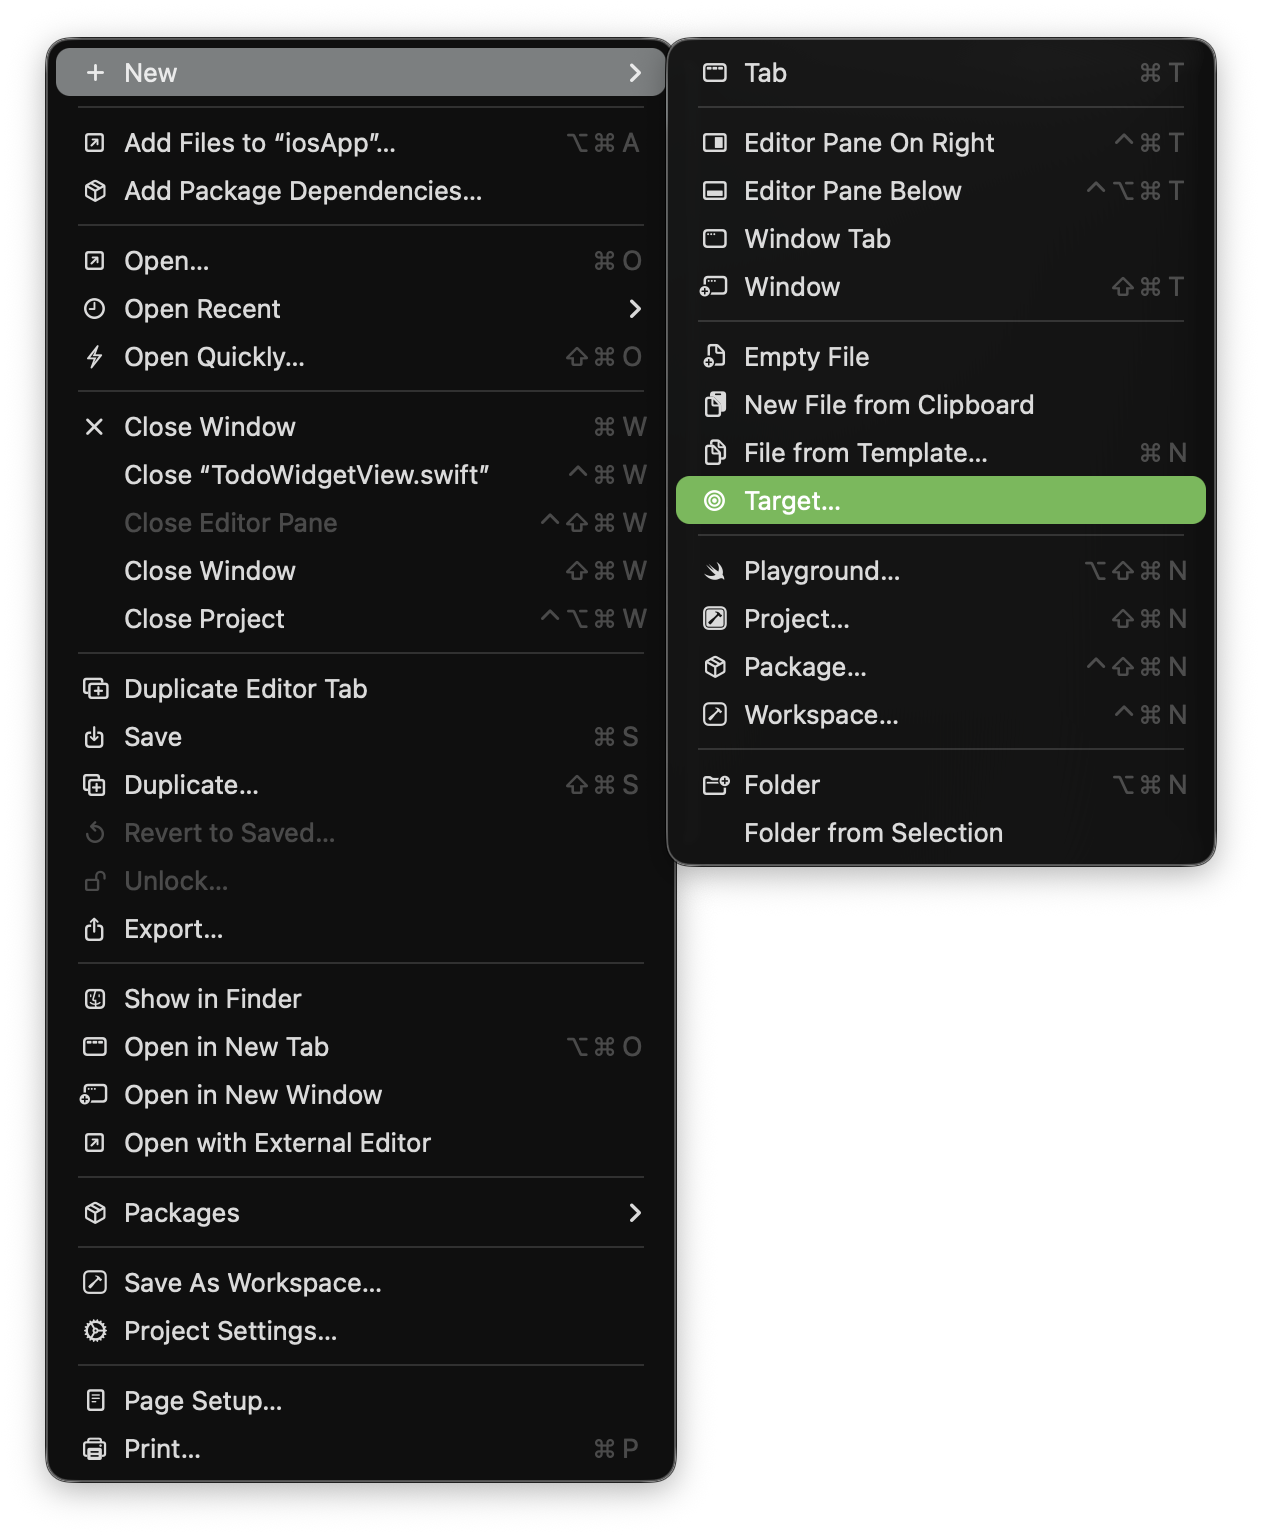
- Open your project in Xcode.
- Select File > New > Target....
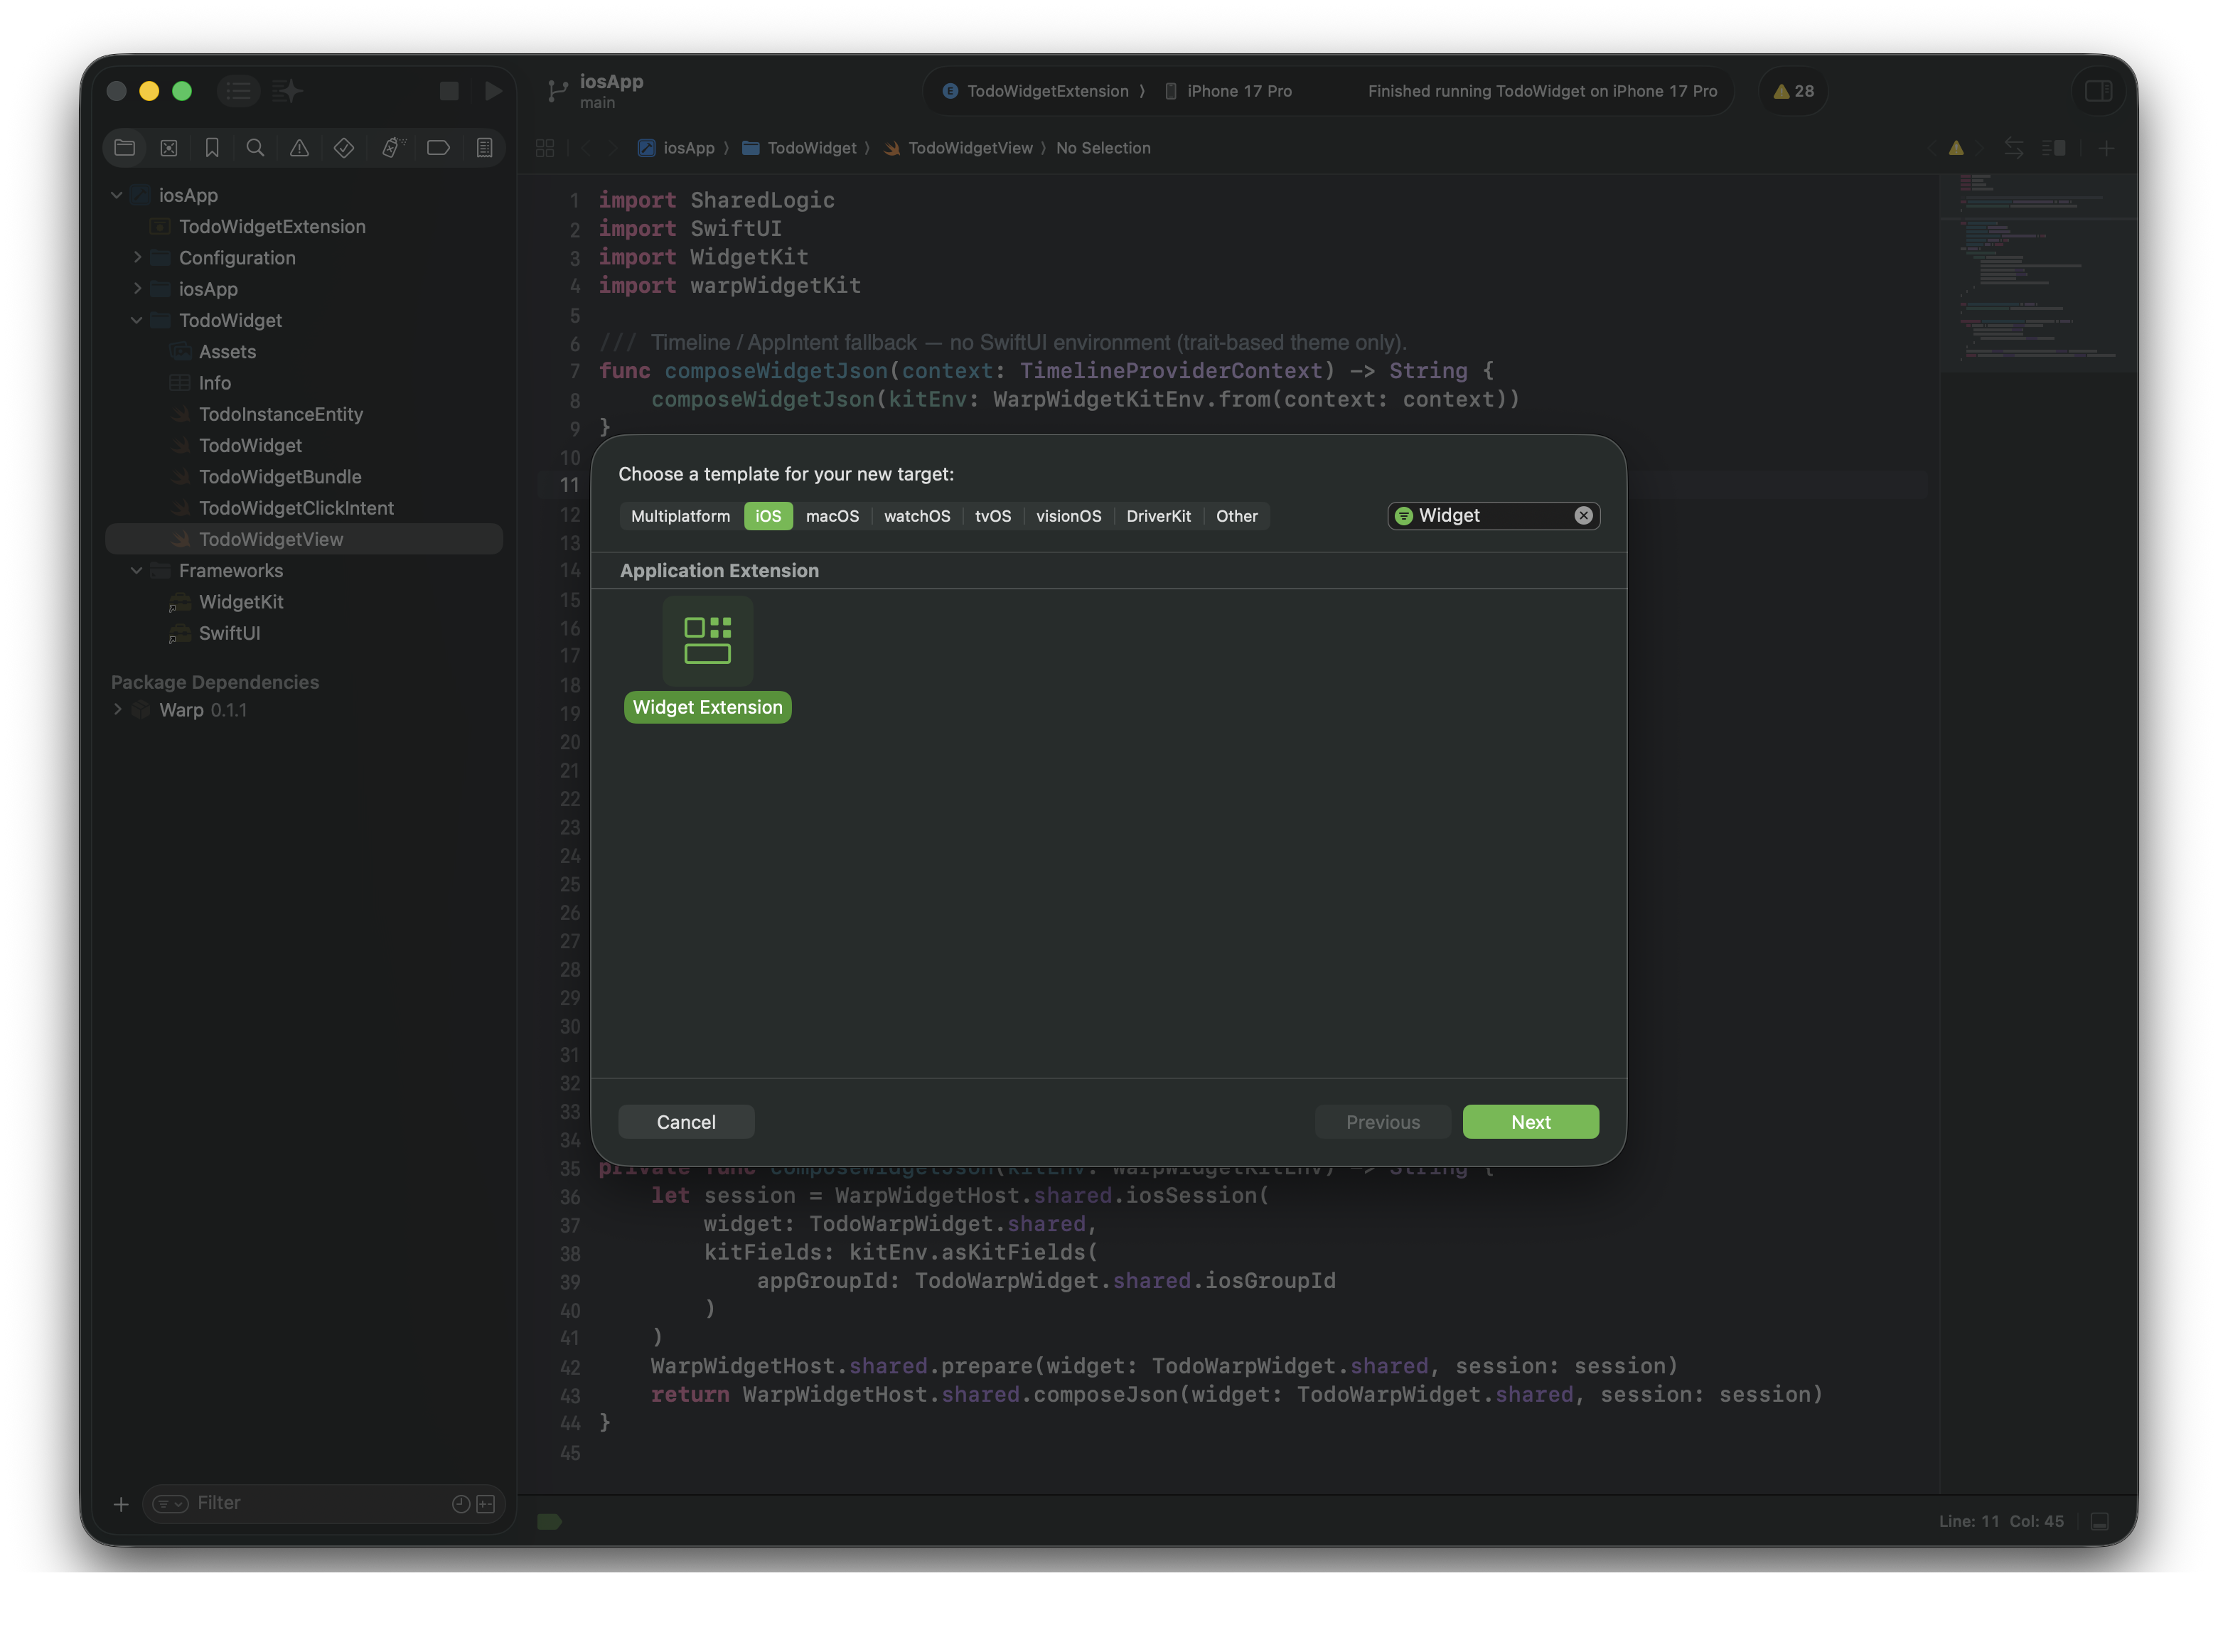
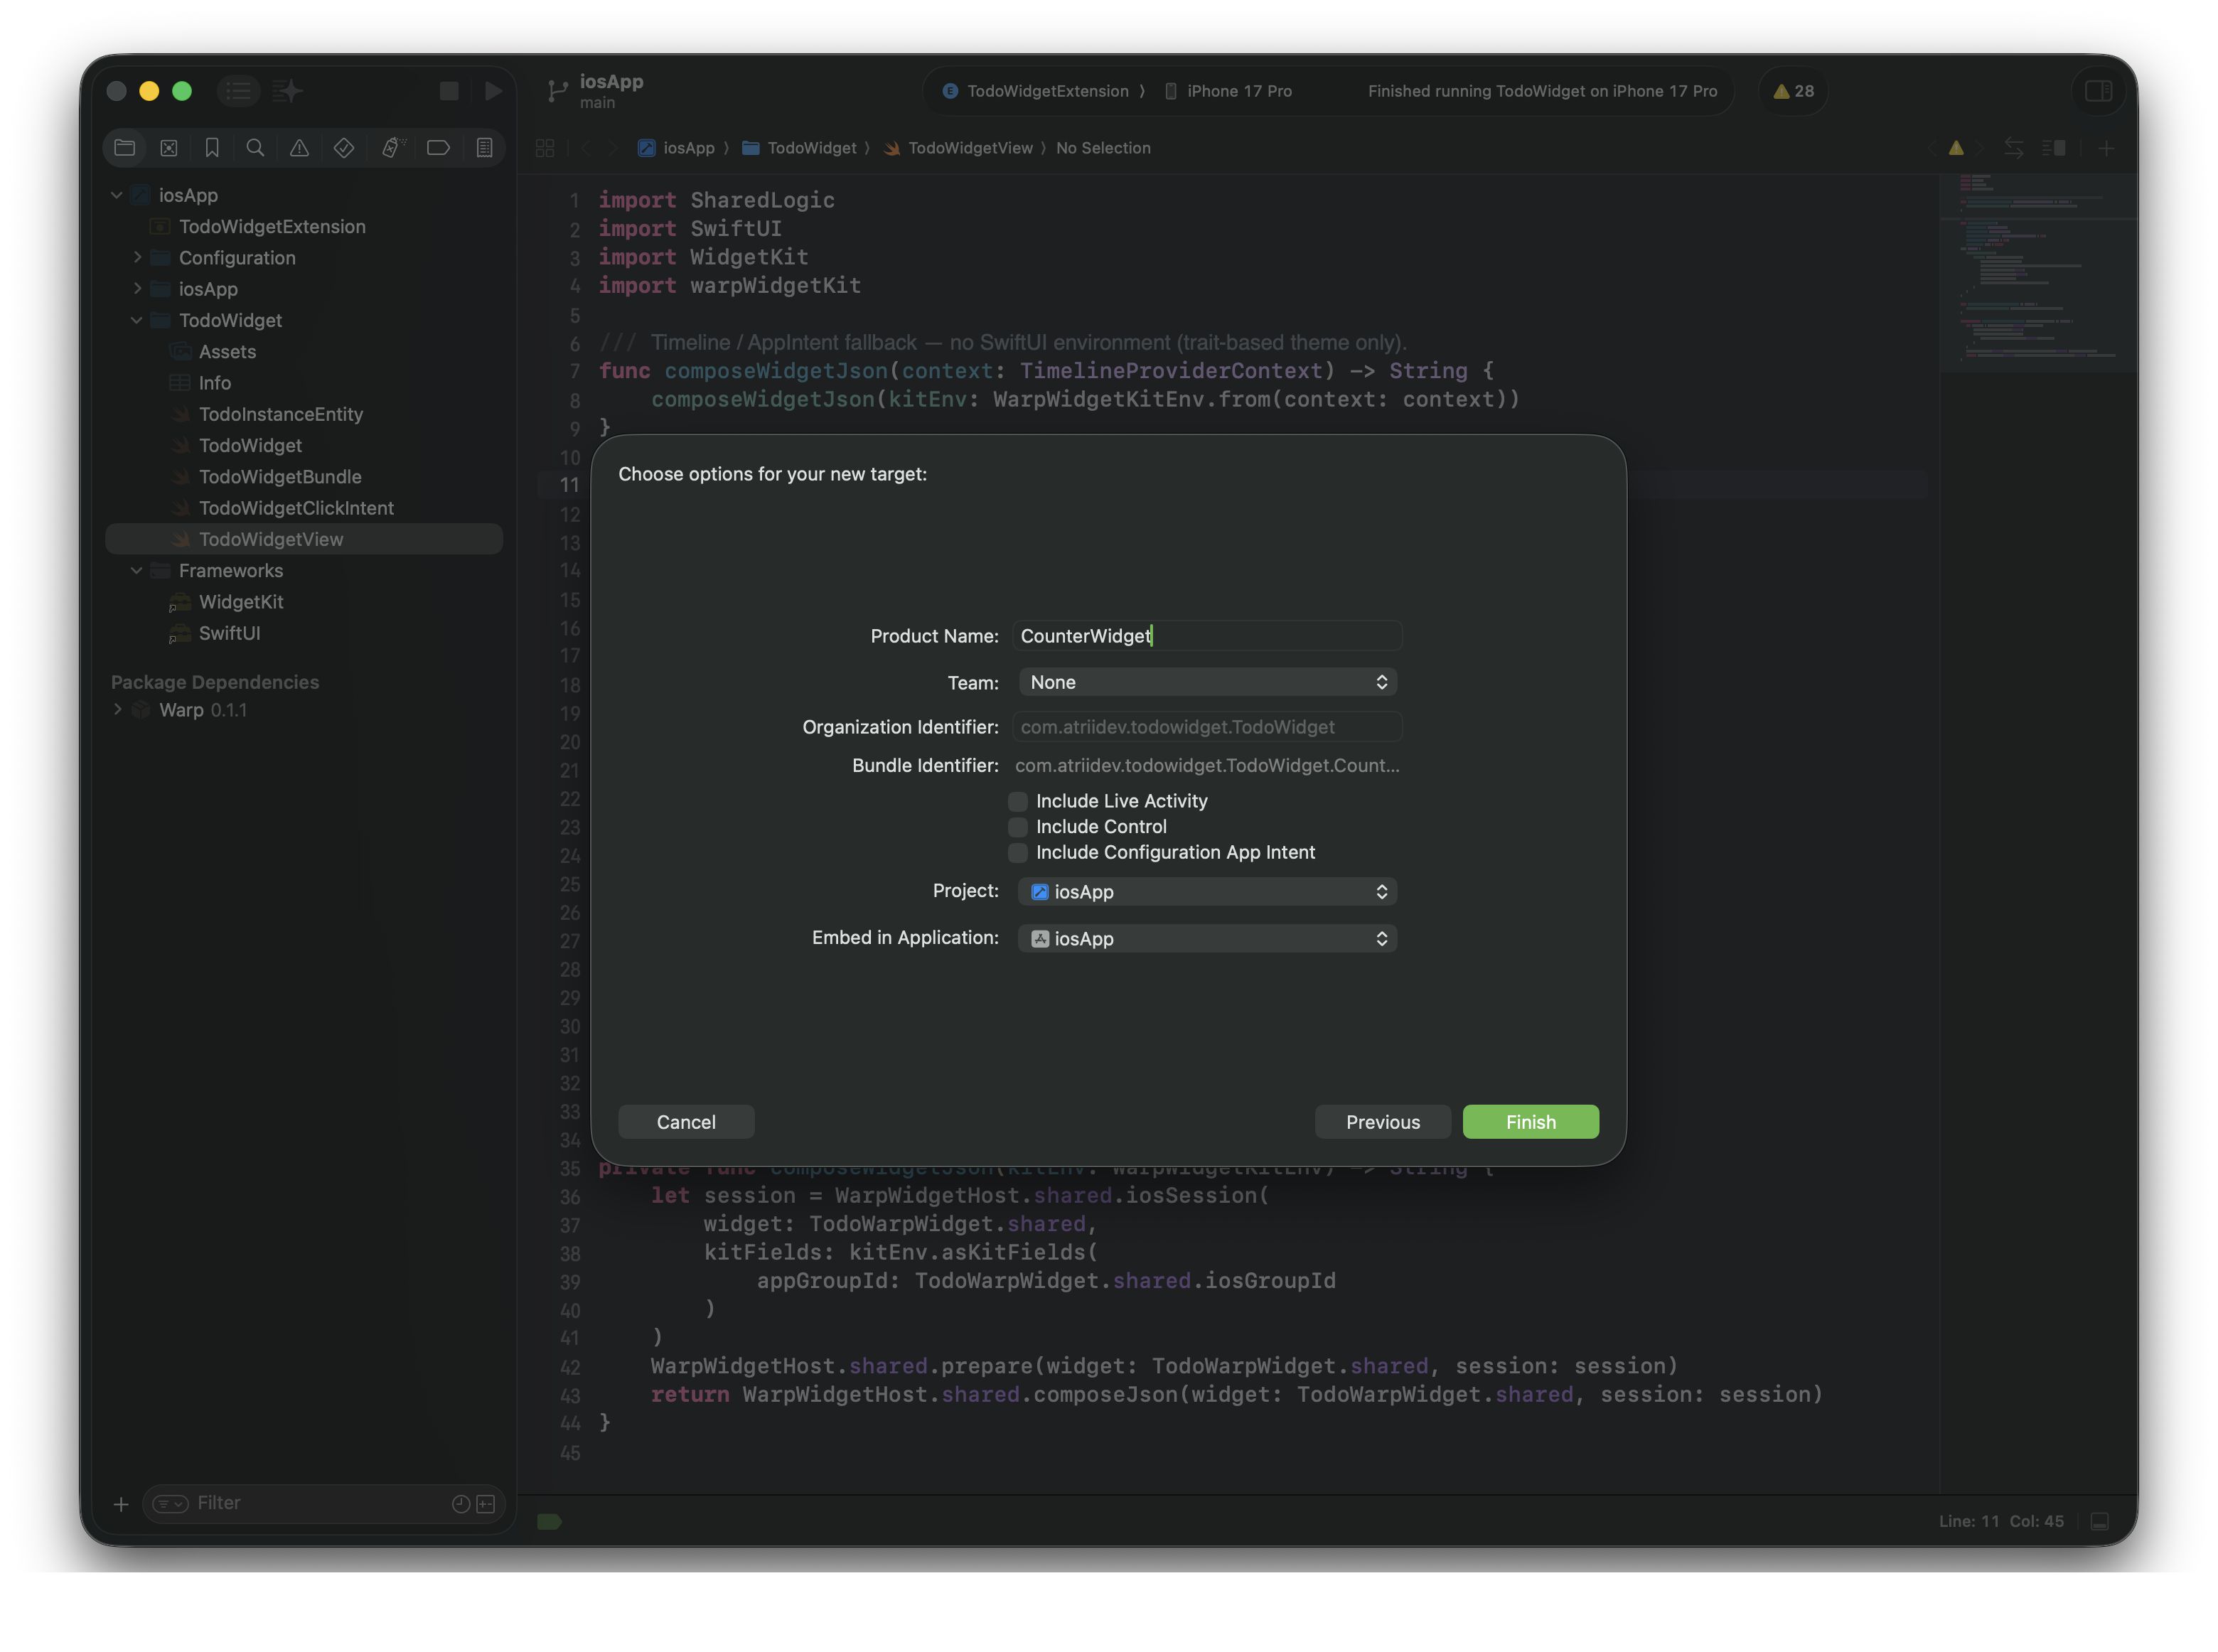
- Choose Widget Extension, enter a name for your target (e.g.,
AppWidget), and finish creation.
Step 3.2 – Add Swift Package Dependency (warpWidgetKit)
- Go to File > Add Package Dependencies... in Xcode.
- Enter the repository URL:
https://github.com/DevAtrii/Warp.git - Select the latest version and add the
warpWidgetKitpackage product to your Widget Extension Target.
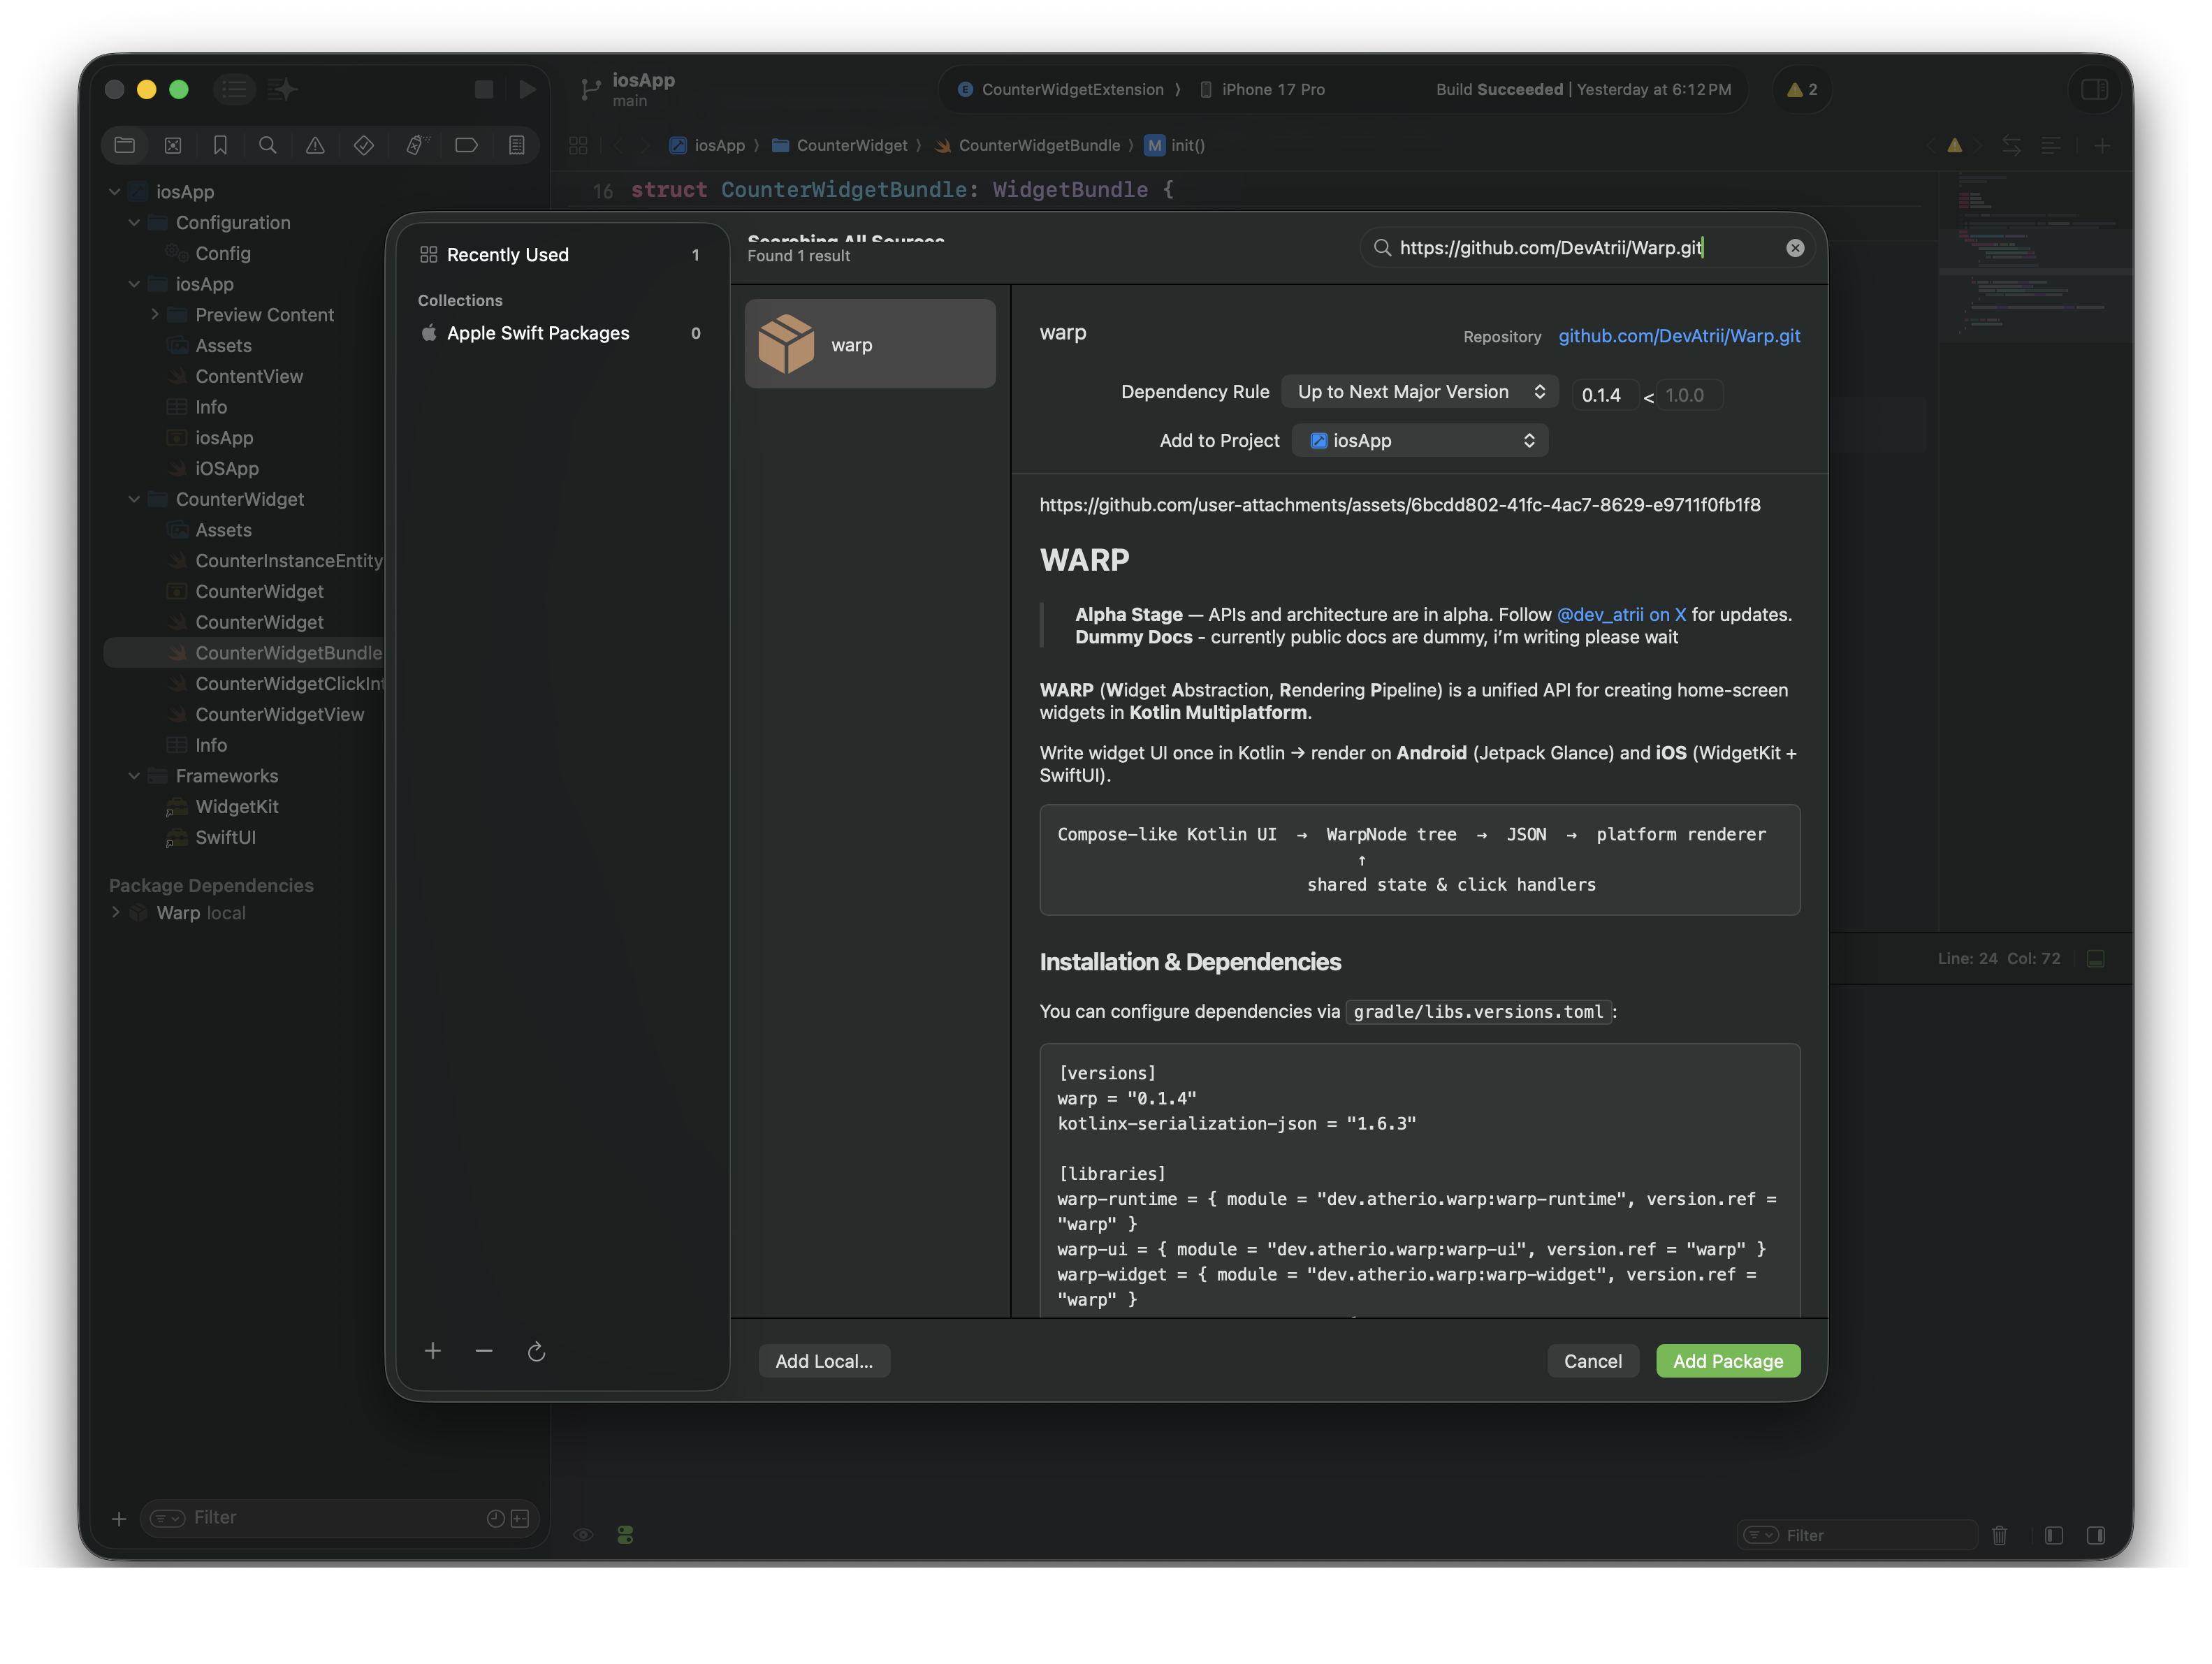
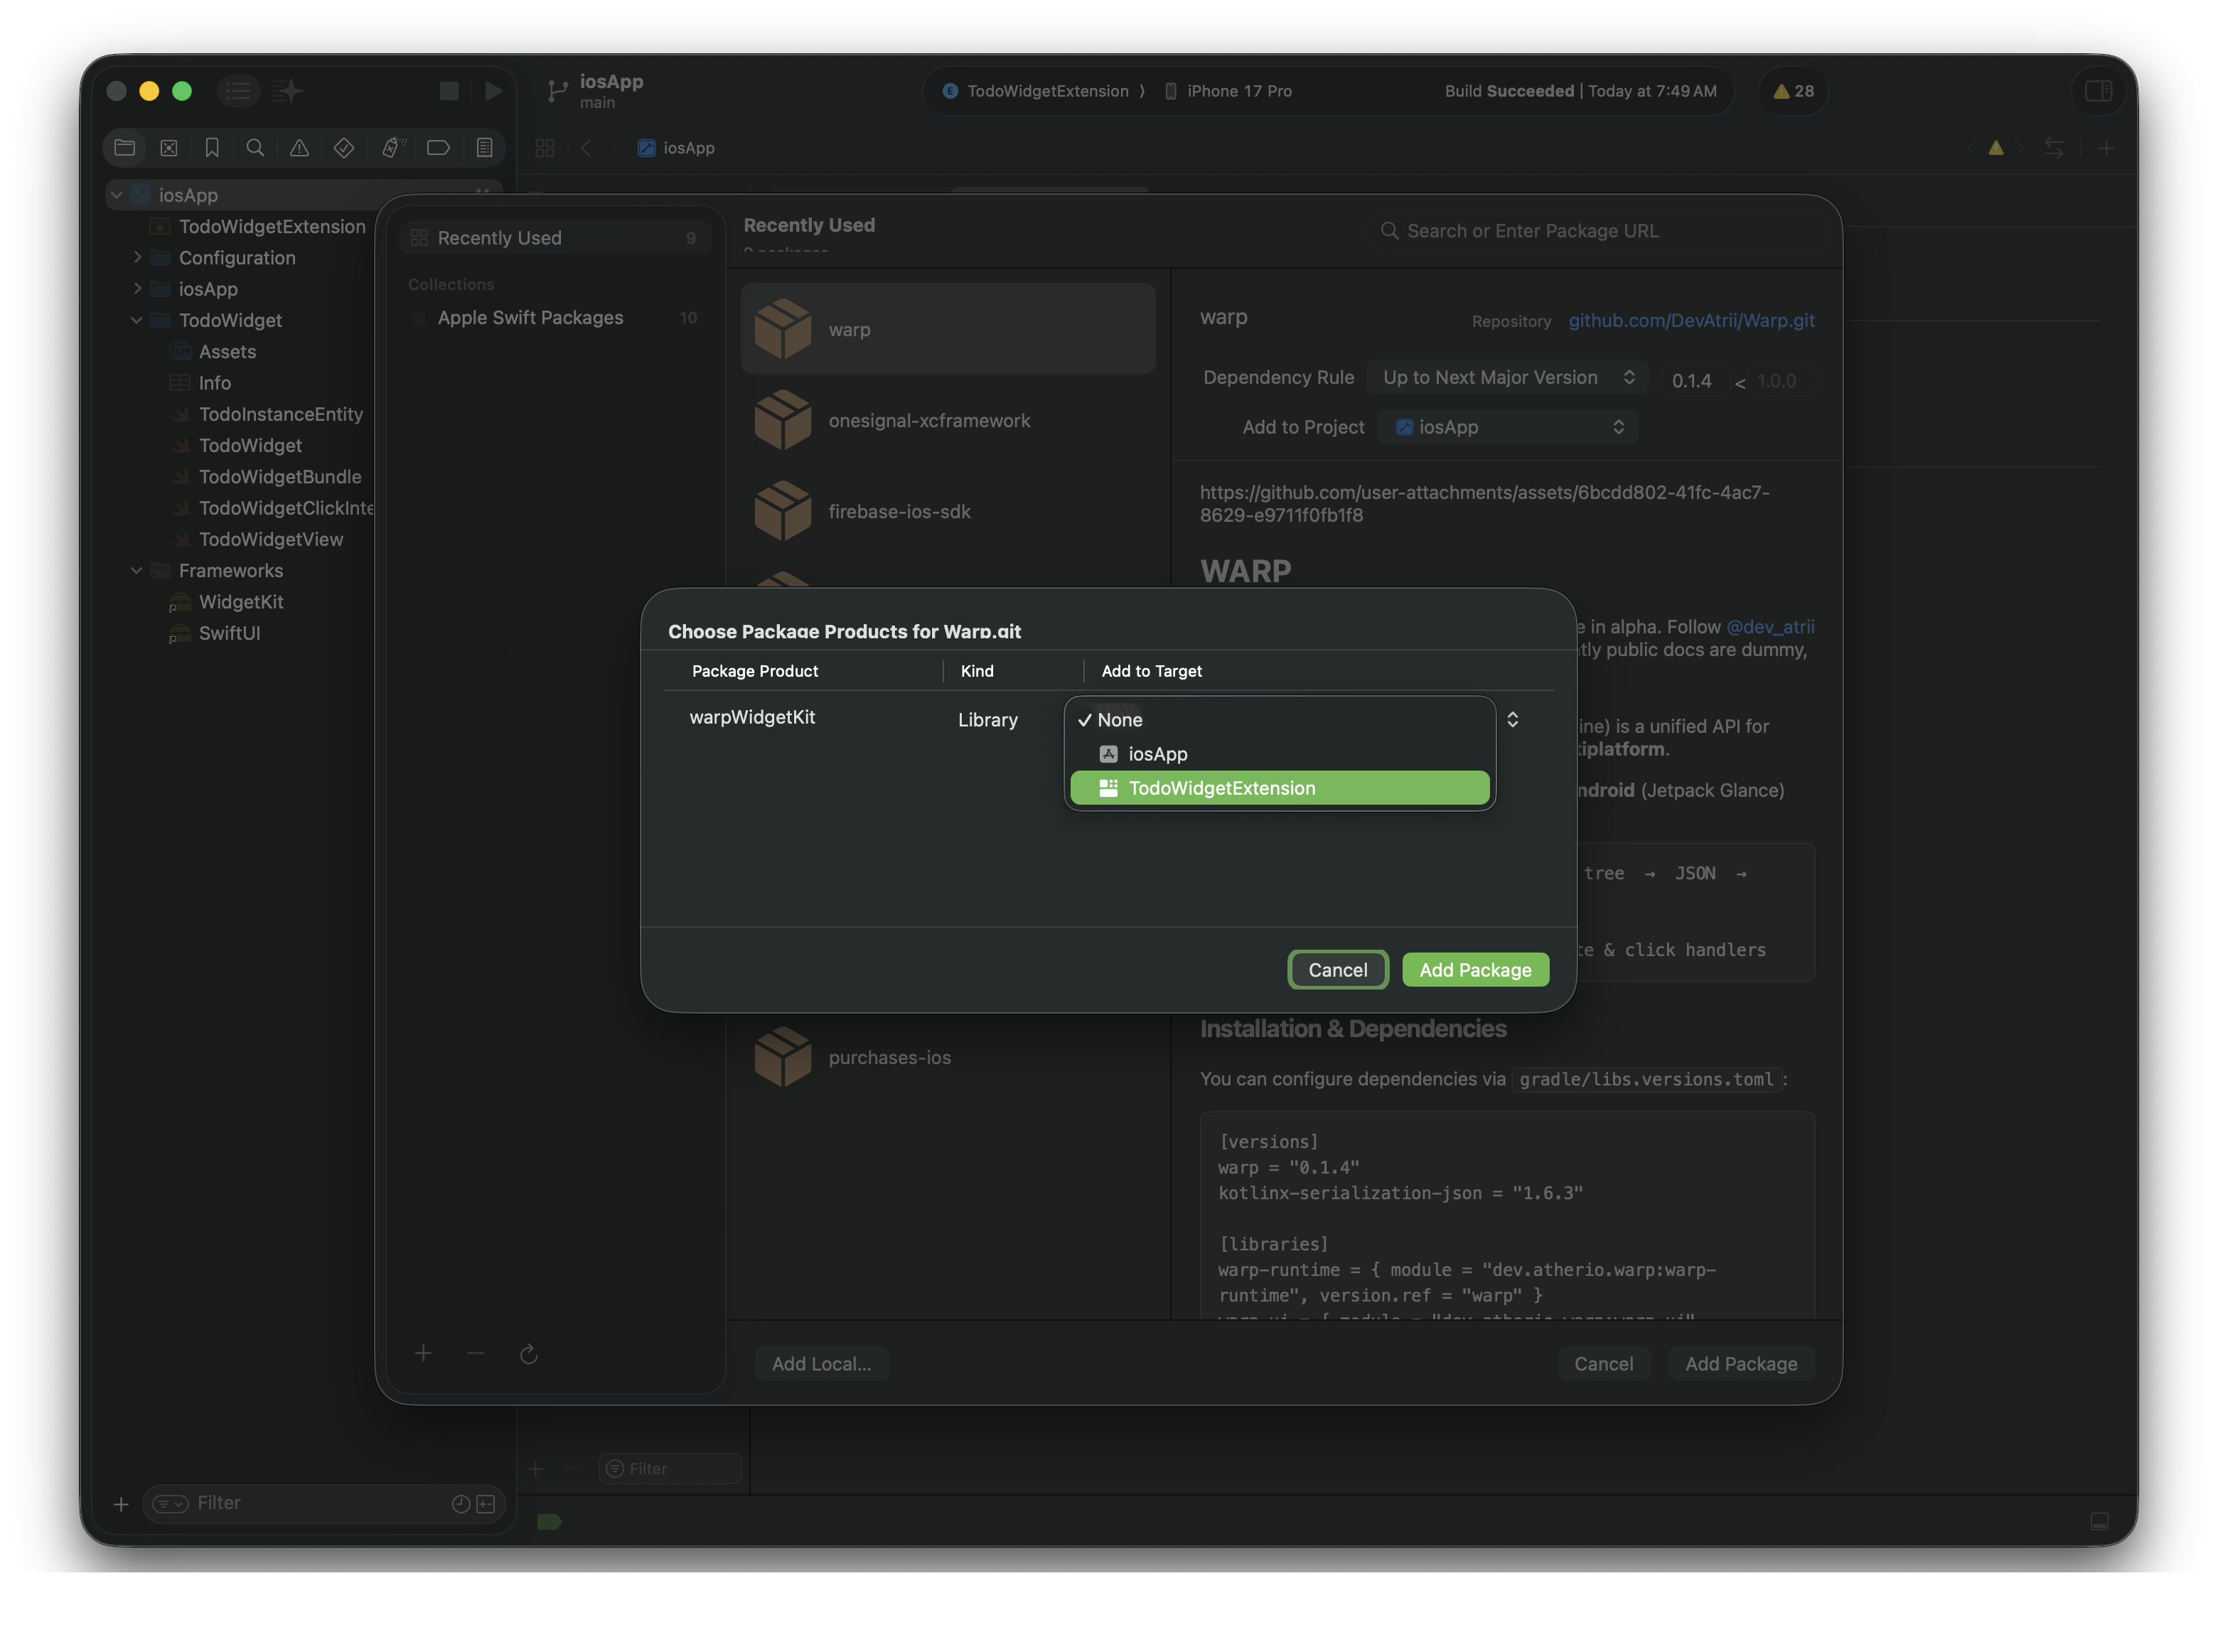
Step 3.3 – Configure App Group Capability
- Select your project root in Xcode.
- Under Signing & Capabilities, add the App Groups capability to both your Main App Target and Widget Extension Target.
- Ensure both targets use the exact same App Group ID (e.g.,
group.com.yourcompany.yourapp).
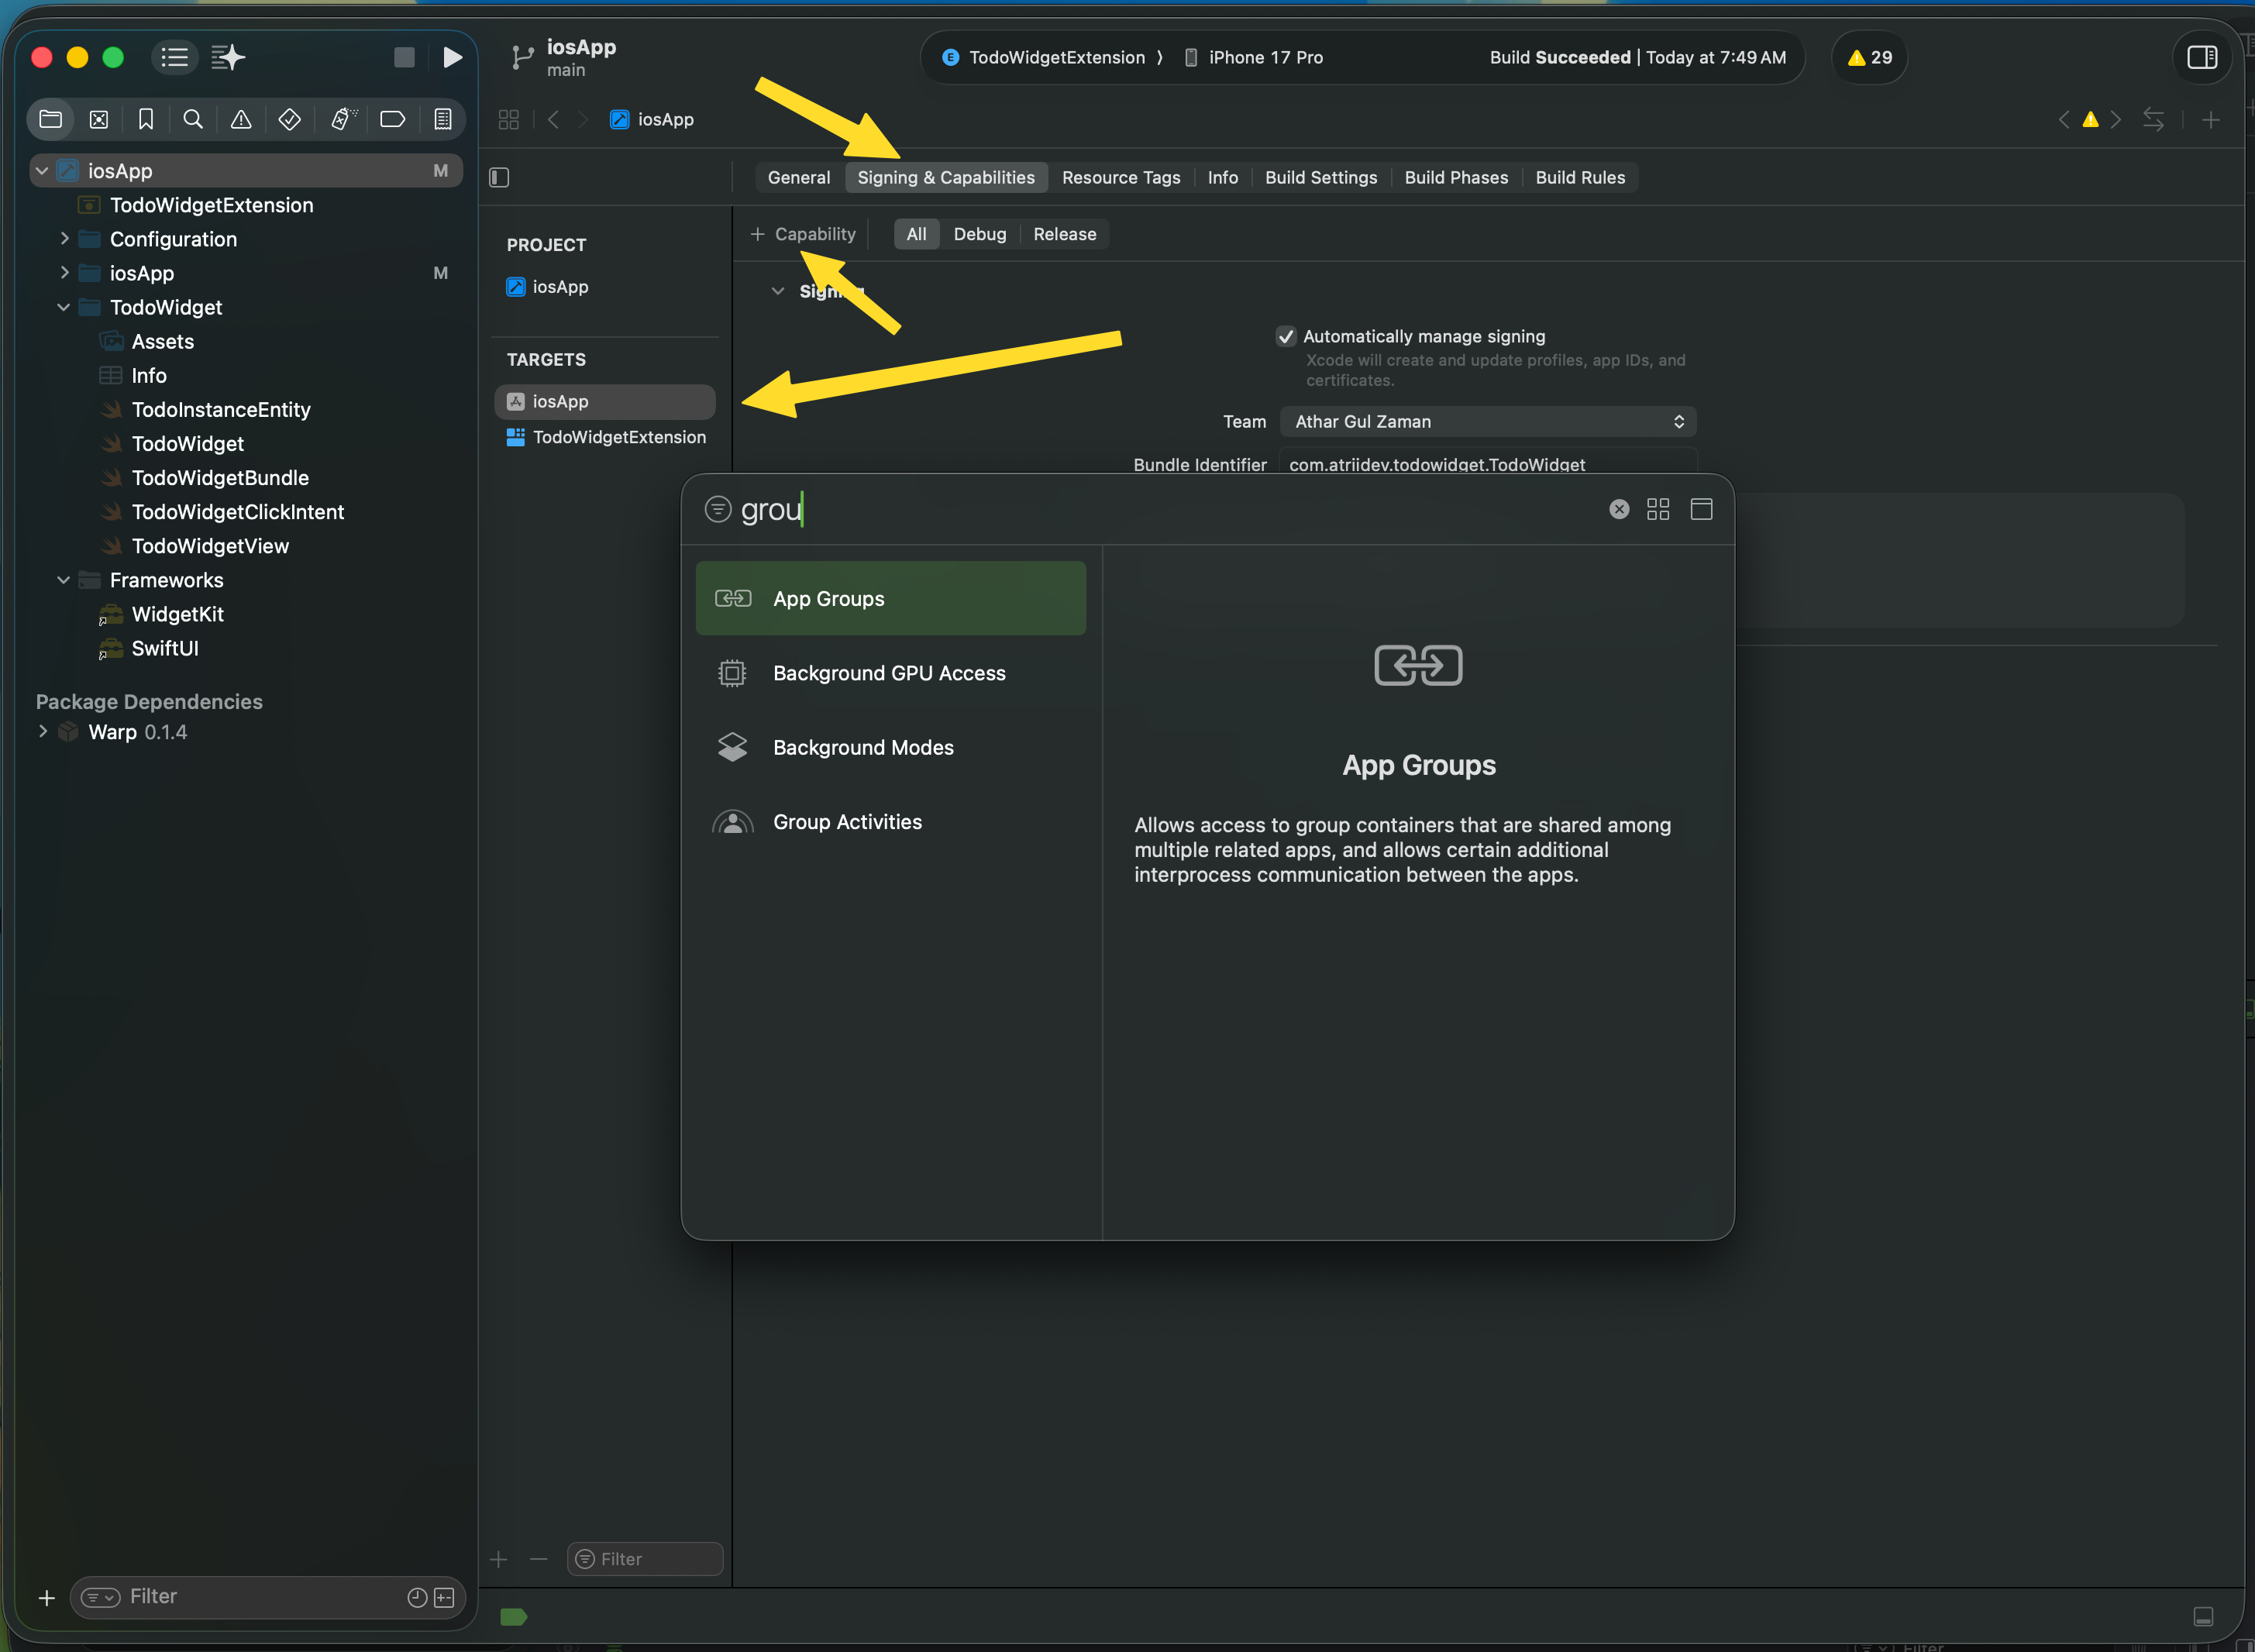
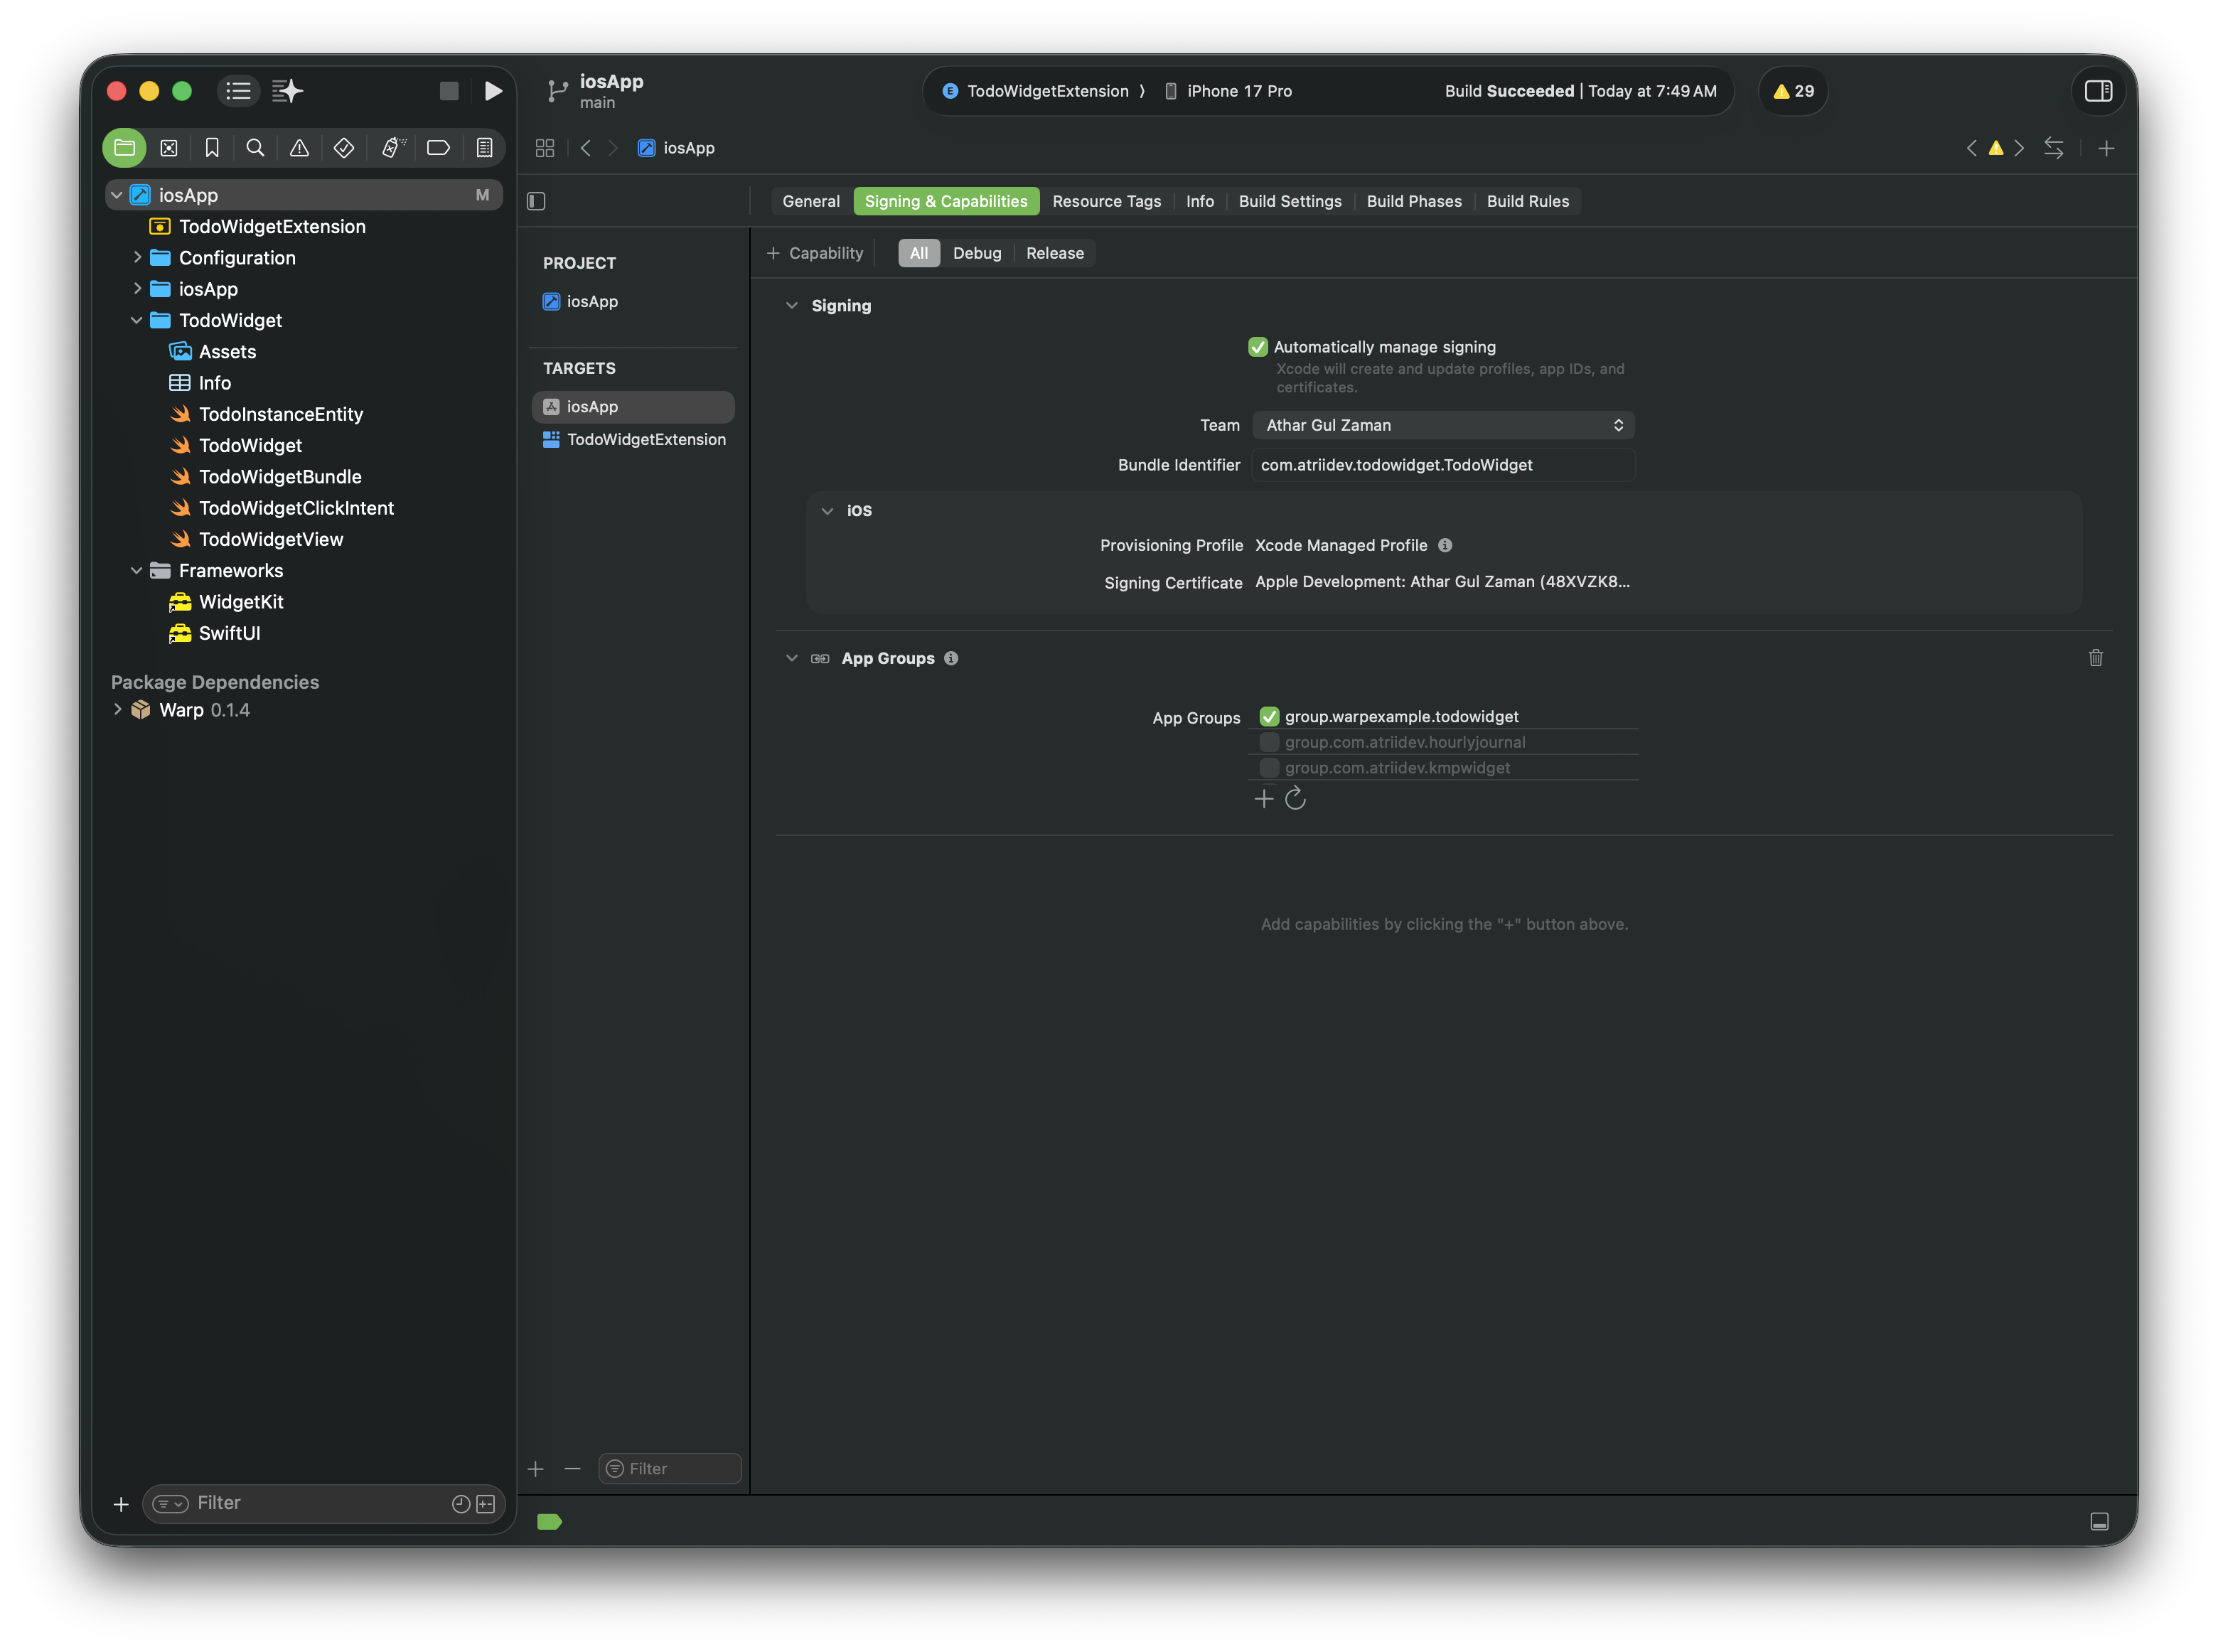
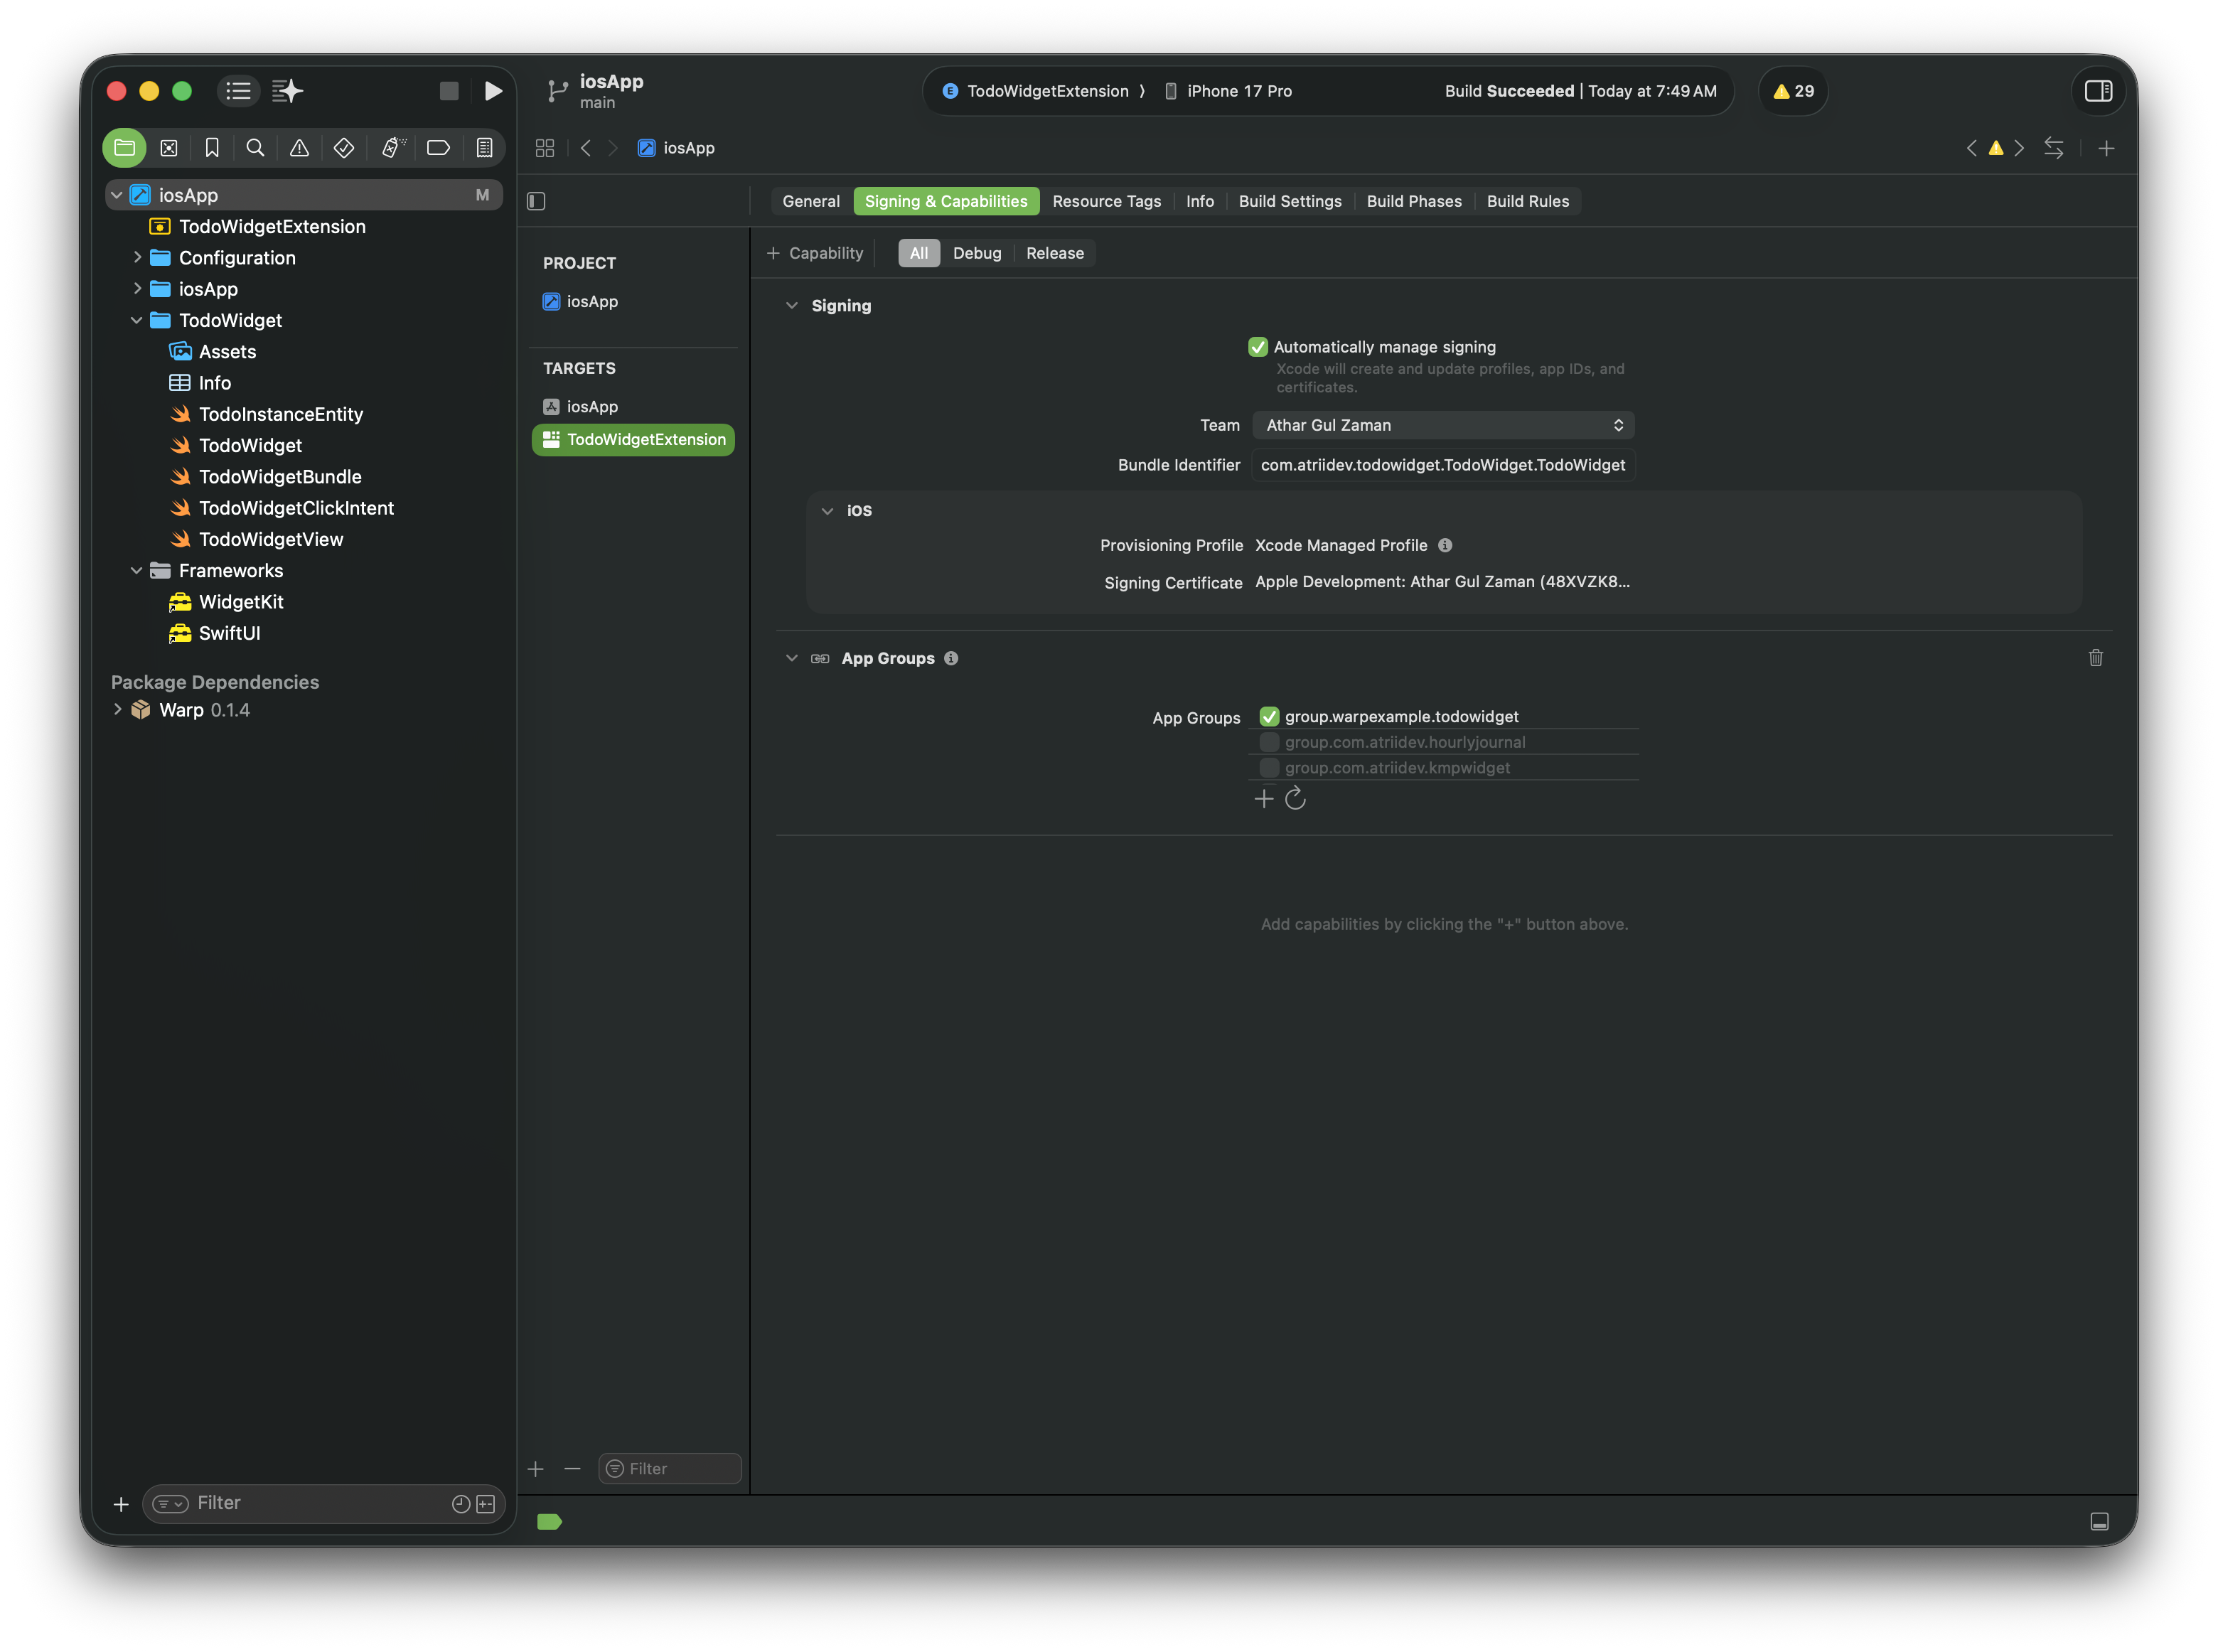
Important
Add same App Group to both Main App Target and Widget Extension Target.
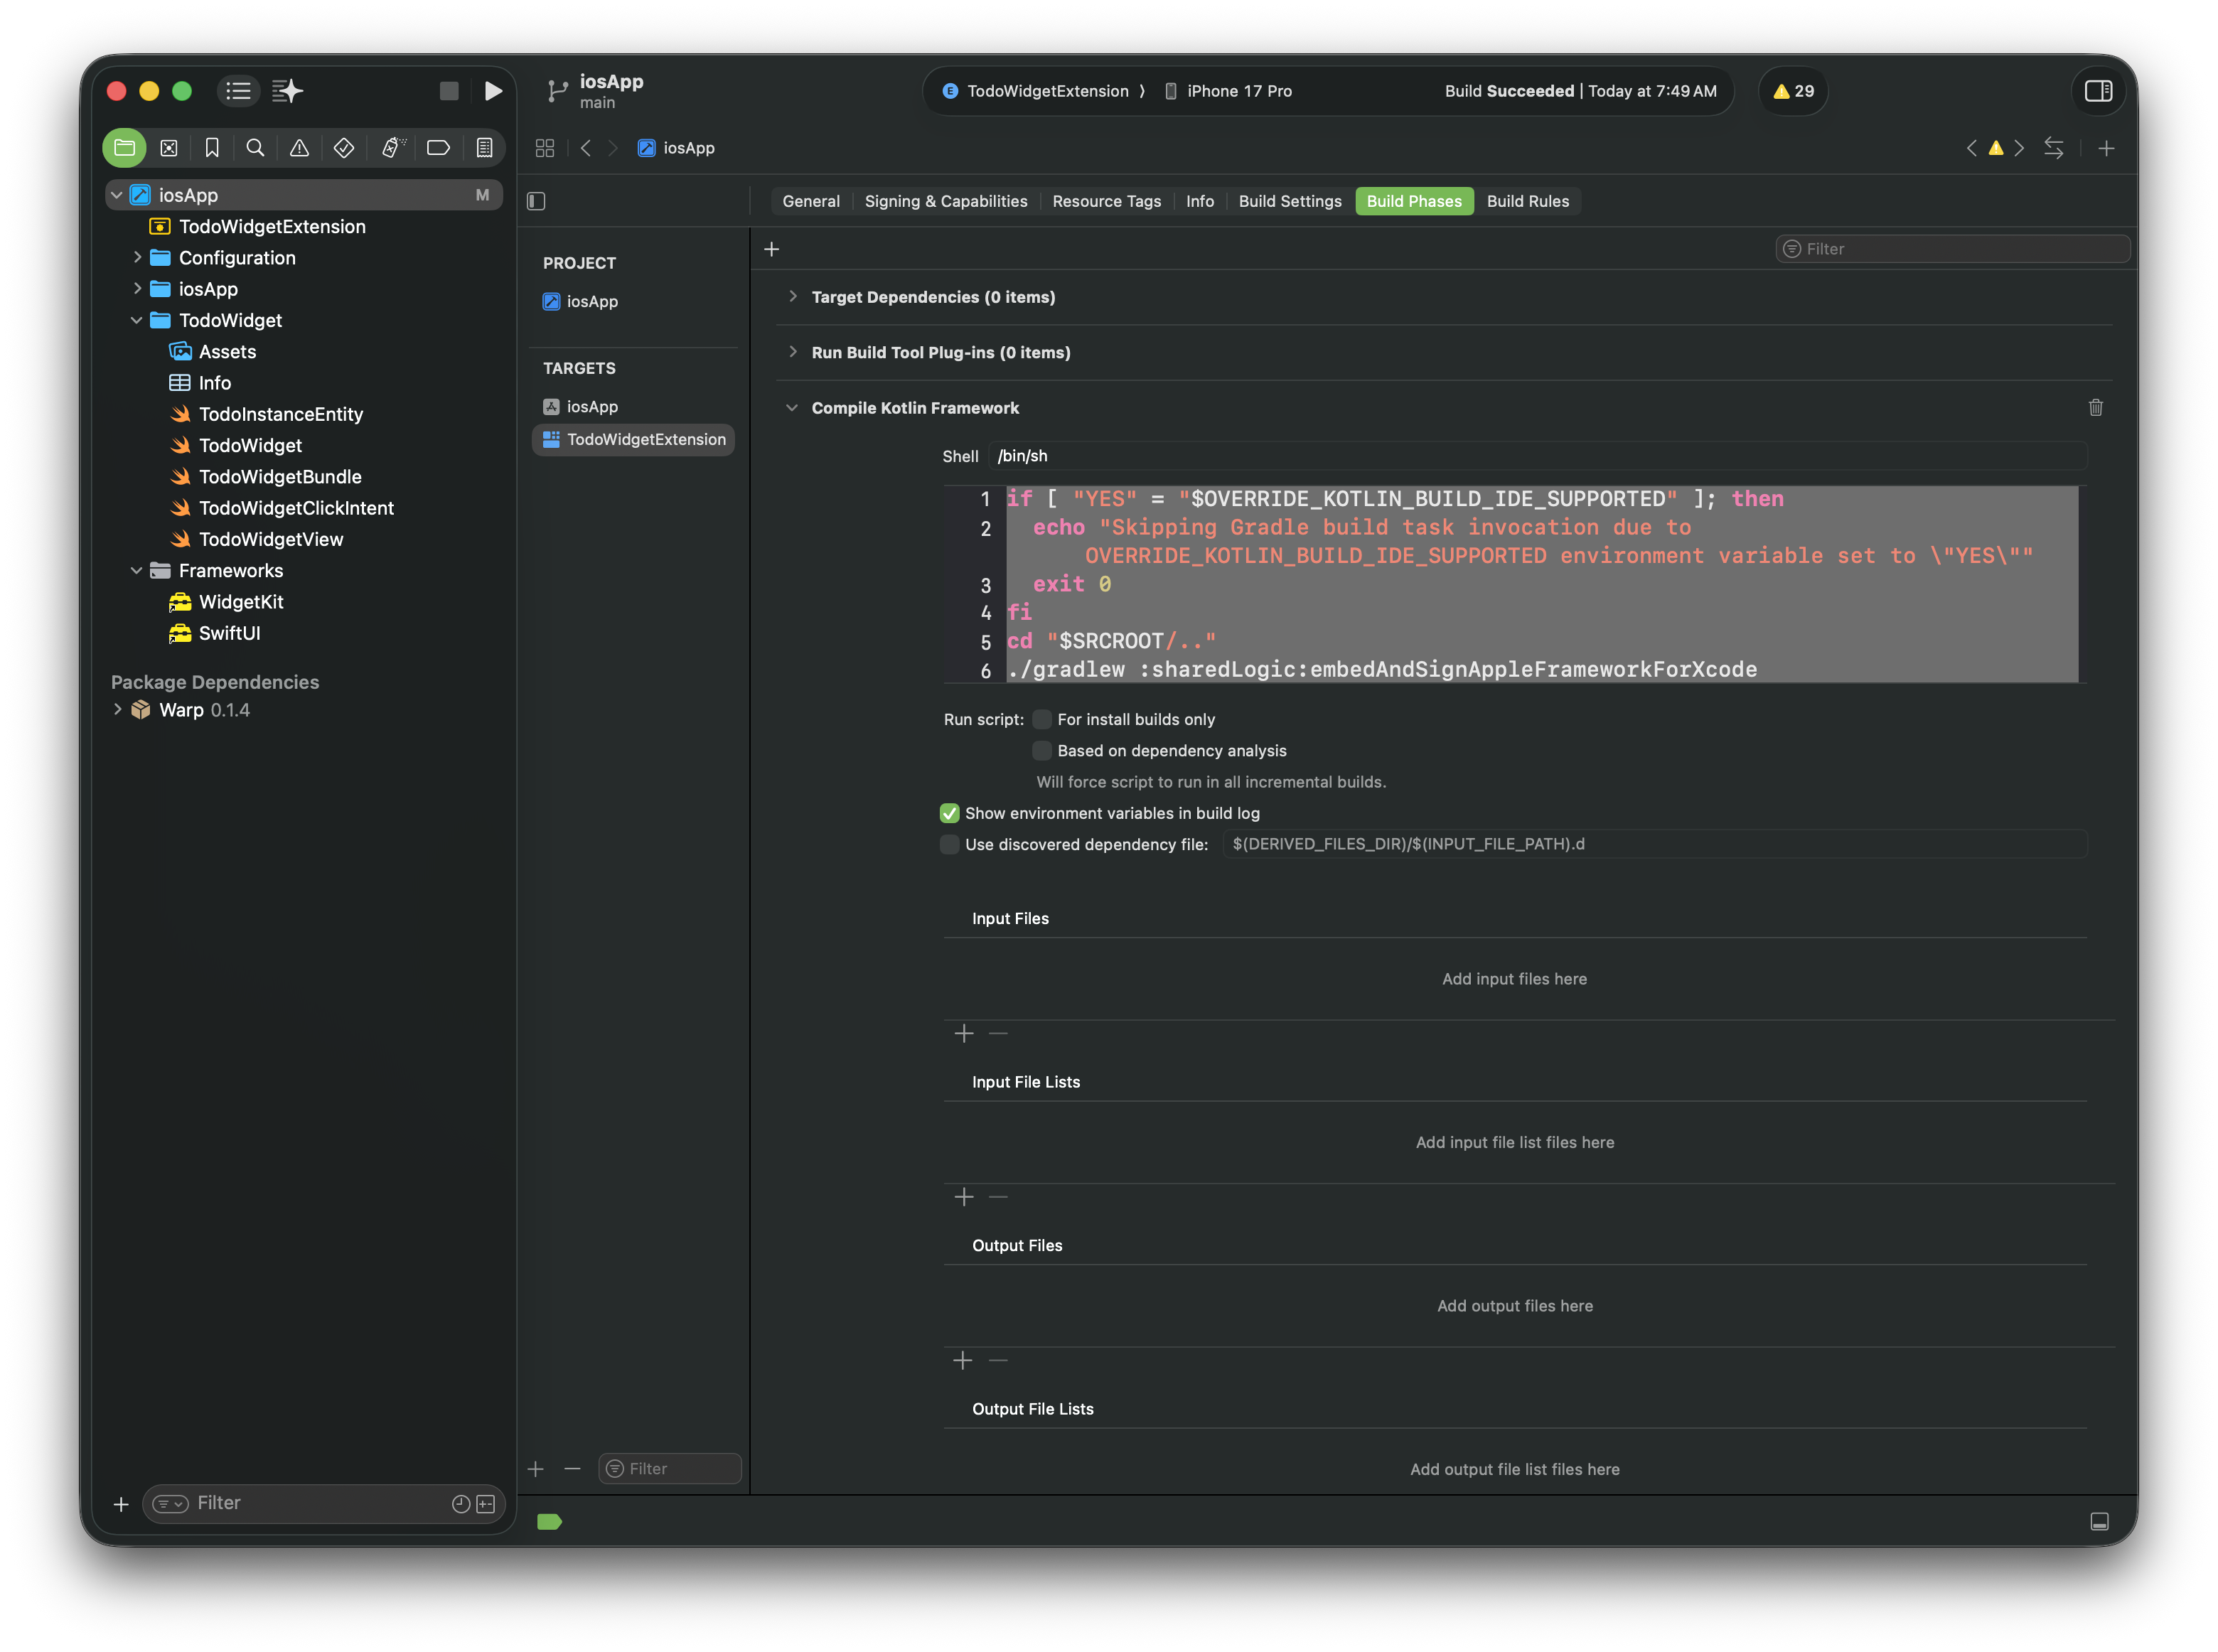
Step 3.4 – Add Compile Kotlin Build Phase
Add a Run Script build phase in Xcode so that your Kotlin Multiplatform framework compiles automatically when building your Widget Extension:
- Select your Widget Extension Target > Build Phases.
- Click + > New Run Script Phase.
- Drag to move this phase above Compile Sources.
- Add the Kotlin framework compilation script:
if [ "YES" = "$OVERRIDE_KOTLIN_BUILD_IDE_SUPPORTED" ]; then
  echo "Skipping Gradle build task invocation due to OVERRIDE_KOTLIN_BUILD_IDE_SUPPORTED environment variable set to \"YES\""
  exit 0
fi
cd "$SRCROOT/.."
./gradlew :sharedLogic:embedAndSignAppleFrameworkForXcode
Tip
You can also copy this from iosApp build phase to match your project specific setup.